2015年1月27日 星期二

[iOS] 警告訊息框 + 帳號密碼輸入

練習到這部分又覺得這個功能很實用,於是又放上來了 。

其實跟昨天的那篇沒有差太多,但就是進階版本。(詳情可以看 警號訊息框 )

先放上完成圖 & code


一樣是在viewcontroller.m裡面做修改喔!

詳細的備註程式裡面有寫完整了,如果還不會也是可以發問

//
//  ViewController.m
//  AlertDialog_with_account_n_passwd
//
//  Created by daniel on 2015/1/27.
//  Copyright (c) 2015 daniel. All rights reserved.
//

#import "ViewController.h"

@interface ViewController ()

@end

@implementation ViewController

- (void)viewDidLoad {
    [super viewDidLoad];
    // Do any additional setup after loading the view, typically from a nib.
}

- (void)didReceiveMemoryWarning {
    [super didReceiveMemoryWarning];
    // Dispose of any resources that can be recreated.
}

- (void) viewDidAppear:(BOOL)animated
{
    //create a UIAlertController
    UIAlertController *alertController = [UIAlertController
                                          alertControllerWithTitle:@"Title" message:@"message" preferredStyle:UIAlertControllerStyleAlert];
    //declare a "cancel" button
    UIAlertAction *cacelAction = [UIAlertAction actionWithTitle:@"cancel" style:UIAlertActionStyleDefault handler: ^(UIAlertAction *action){
        [self dismissViewControllerAnimated:YES completion:nil];}];
    //declare a "login" button
    UIAlertAction *okAction = [UIAlertAction actionWithTitle:@"login" style:UIAlertActionStyleDefault
        handler:^(UIAlertAction *action){
            NSString *uid = ((UITextField *) [alertController.textFields objectAtIndex:0]).text;
            NSString *pwd = ((UITextField *) [alertController.textFields objectAtIndex:1]).text;
            NSLog(@"account = %@",uid);
            NSLog(@"password = %@",pwd);}];
    //create first textfield
    [alertController addTextFieldWithConfigurationHandler:^(UITextField *textField)
    {textField.placeholder = @"Login";}];
    //create second textfield
    [alertController addTextFieldWithConfigurationHandler:^(UITextField *textField)
    {textField.placeholder = @"password";
        textField.secureTextEntry = YES;}];
    
    [alertController addAction:cacelAction];
    [alertController addAction:okAction];
    
    [self presentViewController:alertController animated:YES completion:nil];
                                  
}

@end


就是這樣囉!

END

[Mac] Yahoo輸入法 &載點

先說明一下Yahoo輸入法是完全免費的,但已經沒有在更新了,目前只剩下放在github提供大

家下載這樣而已。


下載完成之後記得要修改權限,不然是不能安裝的


安裝完以後要到鍵盤(可以用spotlight找一下鍵盤在哪邊)

按左下角的+ 然後選擇繁體中文 ->找到yahoo奇摩輸入法->確定

就可以囉!

Yahoo輸入法 Mega 載點

2015年1月26日 星期一

[iOS] 跳出警告 / 提醒訊息框

看到這個滿重要又實用的功能 ,決定寫起來記錄一下

在ViewController.m裡面增加 -(void)viewDidAppear:(BOOL) animated{}

簡單講就是宣告一個UIAlertController 然後建立風格、輸入訊息 以及增加按鈕

//
//  ViewController.m
//  Alert Dialog
//
//  Created by daniel on 2015/1/26.
//  Copyright (c) 2015 daniel. All rights reserved.
//

#import "ViewController.h"

@interface ViewController ()

@end

@implementation ViewController

- (void)viewDidLoad {
    [super viewDidLoad];
    // Do any additional setup after loading the view, typically from a nib.
}

- (void)didReceiveMemoryWarning {
    [super didReceiveMemoryWarning];
    // Dispose of any resources that can be recreated.
}

- (void) viewDidAppear:(BOOL)animated
{
    //產生一個UIAlertController 風格為 UIAlertcontrollerSyleAlert
    //風格可以換成UIAlertControllerSyleActionSheet
    UIAlertController *alertController = [UIAlertController
                                          alertControllerWithTitle:@"標題" message:@"訊息" preferredStyle:UIAlertControllerStyleAlert];
    
    //宣告一個確定按鈕
    UIAlertAction *okAction = [UIAlertAction actionWithTitle:@"確定" style:UIAlertActionStyleDefault
    handler:^(UIAlertAction *action){
        //按下按鈕要做的事情寫在這
        [self dismissViewControllerAnimated:YES completion:nil];
    }];
    //將確定按鈕加入到UIAlertController
    [alertController addAction:okAction];
    //顯示這個Controller 也就是訊息框
    [self presentViewController:alertController animated:YES completion:nil];
}


@end


Action 那邊是類似onClick()的時候要做什麼這樣
Style可以選擇兩種


相信大家應該看程式碼就大概瞭解了吧?

就不多解釋了,不過在Objective-C裡面 nil = null這點可能要了解就可以了

END

2015年1月23日 星期五

[iOS] Apple XCode 6 初體驗

先把設備說一下:

Apple Mac Mini 2.4G這一款 1TB 8G RAM

系統是  : Yosemite 10.10

編譯程式: XCode 6


首先還是先創立一個Hello World 來熟悉一下介面


Main.storyboard 負責介面,介面上有任何問題就是看這個檔案


   接下來就是像android 一樣 你在xml檔上面建立的東西 要讓程式知道,所以按著control

   鍵拖曳到程式碼那邊就可以完成宣告了


   顯示出來就是長這樣


負責動作的部份是在  ViewController.m ( like onCreate, onPause)

負責宣告的部分則是在ViewController.h ( 介面--程式碼連結)


**這邊紀錄一下一開始在測試的時候模擬器都是黑屏,搞得很煩

最後解決方式是重新建立一個Project,不然一直有thread1:signal sigabrt 錯誤


大概就是這樣, Apple的開發跟Google差很多 習慣中End


2015年1月22日 星期四

[Android] "ClassNotFoundException" / " Binary XML file line # : Error inflating class” / " multiple dex files define"錯誤解決

在寫Android的時候會使用到別人所用的library,

常常會看到ClassNotFound or Binary XML line #數字 Error inflating class

他的意思就是說(如果我沒有會錯意的話)  :他找不到你import的那個library

為什麼呢?

可能性有幾種(我目前知道解決方式也只有兩種,所以就列出兩種)


1) 你沒有正確import Library


請確定這裡面有打勾了,而不是紅色的X (如果沒有正確import就remove掉重新import一次)


通常新建的專案都會有內建android-support-v4.jar 但是你library又有一份,所以就class not found

exception ,因為她不知道要用哪一個(應該是這樣吧?)

這個就簡單一點,把lib資料夾裡面的android-support-v4.jar 刪除就可以了!

當然會造成classnotfoundexception 跟 error inflating class可能原因有很多,只列舉我找到的解決

方式,紀錄一下 End


補充: multiple dex files define 也是有可能有重複的android-support-v4.jar(刪除即可)

2015年1月20日 星期二

[Android] 簡單氣象搜尋 (使用Yahoo Weather api)

氣象主要可以分為兩類:

1)使用地名(自行輸入)搜尋

2)使用座標(GPS)搜尋

這邊實作的部分是(1)

參考資料為:  zh-wang 在 Github上分享的程式碼

不過稍作修改-------下拉式更新天氣 , 跳出視窗式輸入地名

當然介面也有做調整,不過整體架構還是跟著參考資料修改而來的.


----------------------------------------

整個程式就分為3部分

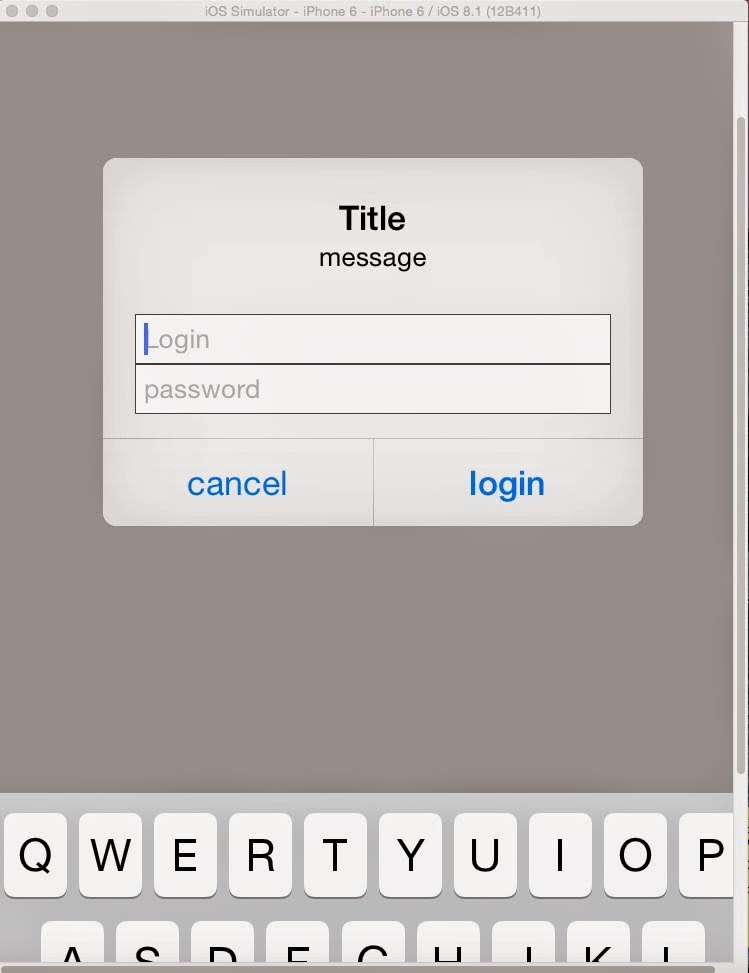
1) 輸入地名(使用AlertDialog技術)

2) 下拉式更新(使用SwipeRefreshLayout技術)

3) 呼叫/解析Yahoo Weather Api 所傳回來的xml(呼叫yahoo Library)


先把MainActivity.class寫出來:

package com.example.weather_practice;

import android.app.Activity;
import android.app.AlertDialog;
import android.content.DialogInterface;
import android.os.Bundle;
import android.os.Handler;
import android.support.v4.widget.SwipeRefreshLayout;
import android.support.v4.widget.SwipeRefreshLayout.OnRefreshListener;
import android.util.Log;
import android.view.LayoutInflater;
import android.view.Menu;
import android.view.MenuItem;
import android.view.View;
import android.widget.EditText;
import android.widget.ImageView;
import android.widget.TextView;
import android.widget.Toast;

import com.civetcat.weather.library.WeatherInfo;
import com.civetcat.weather.library.YahooWeather;
import com.civetcat.weather.library.YahooWeather.SEARCH_MODE;
import com.civetcat.weather.library.YahooWeatherInfoListener;

public class MainActivity extends Activity implements YahooWeatherInfoListener {

private ImageView icon_img;
private TextView city_country_txv;
private TextView weather_status1_txv;
private TextView weather_status2_txv;
private TextView temperature_txv;
private AlertDialog dialog;
private static String City_Name;
private SwipeRefreshLayout laySwipe;

private YahooWeather mYahooWeather = YahooWeather.getInstance(5000, 5000, true);


@Override
protected void onCreate(Bundle savedInstanceState) {
super.onCreate(savedInstanceState);
//requestWindowFeature(Window.FEATURE_NO_TITLE);
setContentView(R.layout.activity_main);
        icon_img = (ImageView) findViewById(R.id.icon_img);
        city_country_txv = (TextView) findViewById(R.id.city_country_txv);
        weather_status1_txv = (TextView) findViewById(R.id.weather_status1_txv);
        weather_status2_txv = (TextView) findViewById(R.id.weather_status2_txv);
        temperature_txv = (TextView) findViewById(R.id.temperature_txv);    
       
        search_dialog();

initView();
        //searchByPlaceName("pingtung city");
}

private void search_dialog(){
// -----------取得Layout reference----------
LayoutInflater inflater = LayoutInflater.from(MainActivity.this);
final View view = inflater.inflate(R.layout.input_city, null);      
       
// -----------產生登入視窗--------
AlertDialog.Builder builder = new AlertDialog.Builder(this);
builder.setTitle("天氣查詢");
builder.setMessage("輸入查詢天氣城市名稱:(英文)");//"Input Target IP:"
builder.setView(view);
builder.setPositiveButton("確定", new DialogInterface.OnClickListener() {
@Override
public void onClick(DialogInterface dialog, int which) {
// TODO Auto-generated method stub
EditText edt = (EditText) view.findViewById(R.id.city_edt);
City_Name = edt.getText().toString();
Log.d("show",edt.getText().toString());
searchByPlaceName(edt.getText().toString());
}
});
builder.setNegativeButton("取消", null);
dialog = builder.create();
dialog.show();
}


private void initView(){
laySwipe = (SwipeRefreshLayout) findViewById(R.id.laySwipe);
laySwipe.setOnRefreshListener(onSwipeToRefresh);
laySwipe.setColorSchemeResources(
           android.R.color.holo_red_light,
           android.R.color.holo_blue_light,
           android.R.color.holo_green_light,
           android.R.color.holo_orange_light);
}

private OnRefreshListener onSwipeToRefresh = new OnRefreshListener(){

@Override
public void onRefresh() {
// TODO Auto-generated method stub
laySwipe.setRefreshing(true);
new Handler().postDelayed(new Runnable(){

@Override
public void run() {
// TODO Auto-generated method stub
laySwipe.setRefreshing(false);
searchByPlaceName(City_Name);
Toast.makeText(getApplicationContext(), "Refresh done!", Toast.LENGTH_SHORT).show();
}},5000);
}};

private void searchByPlaceName(String location) {
mYahooWeather.setNeedDownloadIcons(true);
mYahooWeather.setSearchMode(SEARCH_MODE.PLACE_NAME);
Log.d("searchByPlaceName","searchByPlaceName");
mYahooWeather.queryYahooWeatherByPlaceName(getApplicationContext(), location, MainActivity.this);
}

@Override
public void gotWeatherInfo(WeatherInfo weatherInfo) {
// TODO Auto-generated method stub
// 屏東代碼2306213 or TWXX0015
Log.d("got weather info","got weather info");
        if (weatherInfo != null) {
        city_country_txv.setText(City_Name+ ", "+ weatherInfo.getWOEIDCountry());

        weather_status1_txv.setText(weatherInfo.getCurrentConditionDate());
        weather_status2_txv.setText(weatherInfo.getCurrentText());
       
        temperature_txv.setText(weatherInfo.getCurrentTempC()+"℃");

        Log.d("weather info",weatherInfo.getCurrentText());
if (weatherInfo.getCurrentConditionIcon() != null) {
//設定icon

switch(weatherInfo.getCurrentText()){
//不全部列舉,有些不會發生
case "Freezing Drizzle":
break;
case "Drizzle":
break;
case "Freezing Rain":
break;
case "Light Rain":
icon_img.setImageResource(R.drawable.rain_wh);
break;
case "Showers":
break;
case "Blustery":
break;
case "Windy":
break;
case "Cold":
break;
case "Cloudy":
break;
case "Mostly Cloudy":
icon_img.setImageResource(R.drawable.double_cloud_wh);
break;
case "Partly Cloudy":
icon_img.setImageResource(R.drawable.cloud_wh);
break;
case "Clear": //night
break;
case "Sunny":
break;
case "Fair": //day or night
icon_img.setImageResource(R.drawable.night_wh);
break;
case "Hot":
break;
case "Isolated Thunderstorms":
break;
case "Scattered Thunderstorms":
break;
case "Scattered Showers":
break;
case "Thundershowers":
break;
case "Isolated Thundershowers":
break;
case "Haze":
icon_img.setImageResource(R.drawable.haze_wh);
break;
case "Fog":
icon_img.setImageResource(R.drawable.haze_wh);
break;
case "not available":
break;
}
}
        } else {
        }
}


@Override
public boolean onCreateOptionsMenu(Menu menu) {
// Inflate the menu; this adds items to the action bar if it is present.
getMenuInflater().inflate(R.menu.main, menu);
return true;
}

@Override
public boolean onOptionsItemSelected(MenuItem item) {
// Handle action bar item clicks here. The action bar will
// automatically handle clicks on the Home/Up button, so long
// as you specify a parent activity in AndroidManifest.xml.
int id = item.getItemId();
if (id == R.id.action_settings) {
return true;
}
return super.onOptionsItemSelected(item);
}
}


********在這邊特別註明一下,yahoo有些天氣狀態還沒更新上去,所以switch case的部分要自行做調整(不過不影響整個程式碼運行)*******


search_dialog()函式就是負責跳出視窗讓使用者可以輸入地名,查詢天氣

initView() 則是初始化下拉式更新的元件

OnRefreshListener() 就監聽 沒別的 onRefresh()裡面就寫你更新時要做的動作,至於handler只是

因為要show toast而已,沒太大用處:)

searchByPlaceName() 這個很重要,他會呼叫到yahoo library 透過

SEARCH_MODE.PLACE_NAME 這方式來搜尋天氣

然後因為我們一開頭有implement YahooWeatherInfoListener 所以他會自己監聽,(裡面有一個函式gotWeatherInfo,就是listener 實作的方法)


詳細的就請大家自己看一下囉,應該不難才對(?)


Activity_main.xml:

<android.support.v4.widget.SwipeRefreshLayout xmlns:android="http://schemas.android.com/apk/res/android"
    xmlns:tools="http://schemas.android.com/tools"
    android:id="@+id/laySwipe"
    android:layout_width="match_parent"
    android:layout_height="match_parent"
    android:background="#87CEFA"
    android:orientation="vertical"
    tools:context="ah.hathi.simpleweather.WeatherActivity"
    tools:ignore="MergeRootFrame" >

    <LinearLayout
        android:layout_width="match_parent"
        android:layout_height="match_parent"
        android:orientation="vertical" >

        <TextView
            android:id="@+id/city_country_txv"
            android:layout_width="match_parent"
            android:layout_height="wrap_content"
            android:layout_marginTop="@dimen/activity_vertical_margin"
            android:gravity="center"
            android:text="城市,國家"
            android:textAppearance="?android:attr/textAppearanceMedium" />

        <ImageView
            android:id="@+id/icon_img"
            android:layout_width="match_parent"
            android:layout_height="wrap_content"
            android:src="@drawable/sun_wh" />

        <TextView
            android:id="@+id/weather_status1_txv"
            android:layout_width="match_parent"
            android:layout_height="wrap_content"
            android:gravity="center"
            android:text="天氣狀態1"
            android:textAppearance="?android:attr/textAppearanceMedium" />

        <TextView
            android:id="@+id/weather_status2_txv"
            android:layout_width="match_parent"
            android:layout_height="wrap_content"
            android:gravity="center"
            android:text="天氣狀態2"
            android:textAppearance="?android:attr/textAppearanceMedium" />

        <FrameLayout
            android:layout_width="match_parent"
            android:layout_height="wrap_content"
            android:layout_weight="0.5" >
        </FrameLayout>

        <TextView
            android:id="@+id/temperature_txv"
            android:layout_width="match_parent"
            android:layout_height="wrap_content"
            android:layout_marginBottom="@dimen/activity_vertical_margin"
            android:gravity="center"
            android:text="溫度"
            android:textAppearance="?android:attr/textAppearanceLarge"
            android:textSize="@dimen/temperature_text_size" />
    </LinearLayout>

</android.support.v4.widget.SwipeRefreshLayout>


input_city.xml:

<?xml version="1.0" encoding="utf-8"?>
<EditText xmlns:android="http://schemas.android.com/apk/res/android"
    android:id="@+id/city_edt"
    android:layout_width="match_parent"
    android:layout_height="match_parent" >

</EditText>

然後再values/dimens.xml 還有宣告一個

<resources>

    <!-- Default screen margins, per the Android Design guidelines. -->
    <dimen name="activity_horizontal_margin">16dp</dimen>
    <dimen name="activity_vertical_margin">16dp</dimen>
    <dimen name="temperature_text_size">30dp</dimen>

</resources>

修改這邊就可以方便修改溫度的字型大小


附上完整檔案,以上 


End


2015年1月14日 星期三

[Android] 基礎Google Map教學

終於把這個很煩人的google map弄出一點樣子

寫在這邊紀錄一下

可能會產生的錯誤會有幾種

1)  INSTALL_FAILED_MISSING_SHARED_LIBRARY Error

2) API Key failed

3) Permission denied


第一種很顯然你刷機(flash ROM)時候法google libary沒有匯入

第二種則是API Key你沒有用你專屬的key ->請到 https://console.developers.google.com/ 申請一

個,申請詳細辦法


切記!!! 你的package name要正確,不正確會無法顯示地圖!!

就把SHA1;package.name輸入在空格中,建立,然後就有API key了

第三種解決方式就是檢查你的AndroidManifest.xml是否有加入適當的permission


-------------------------------------------------------------------------------------------------------------------


以下為三項基礎

1.google play library

首先開啟SDK Manager ->檢查google play service (以下用圖來表示)


有錯誤一定是沒有import正確 / 沒有加入external jar files

然後


這部分需要開啟權限


最後原本的網址載點在這邊

https://github.com/googlemaps/hellomap-android

程式碼跟layout可以上去下載來看看

layout:

<?xml version="1.0" encoding="utf-8"?>
<!--
See this page for more XML attribute options
https://developers.google.com/maps/documentation/android/map#using_xml_attributes
-->
<fragment xmlns:android="http://schemas.android.com/apk/res/android"
          xmlns:map="http://schemas.android.com/apk/res-auto"
          android:id="@+id/map"
          android:layout_width="match_parent"
          android:layout_height="match_parent"
          android:name="com.google.android.gms.maps.SupportMapFragment"
          map:mapType="normal"/>


MainActivity:

package com.example.hellomap;

import android.os.Bundle;
import android.support.v4.app.FragmentActivity;
import com.google.android.gms.maps.GoogleMap;
import com.google.android.gms.maps.SupportMapFragment;

public class MainActivity extends FragmentActivity {
    private GoogleMap mMap;

    @Override
    public void onCreate(Bundle savedInstanceState) {
        super.onCreate(savedInstanceState);
        setContentView(R.layout.main);
    }
}


就這樣! 

完成圖 End

2015年1月8日 星期四

[Android] 長按切換2個Activity-----intent.setClass錯誤排除-----onGestureListener監聽手勢


為了讓兩個activity能夠順利切換,花了一些時間研究,

當然中間也遇到一些問題,在這邊紀錄一下.


首先切換Activity是使用intent->startActivity()來做切換

觸發則是長按畫面任意地方


首先先看如何監聽手勢(gesture):

OnGestureListener listener = new OnGestureListener(){

@Override
public boolean onDown(MotionEvent e) {
// TODO Auto-generated method stub
return false;
}

@Override
public boolean onFling(MotionEvent e1, MotionEvent e2,
float velocityX, float velocityY) {
// TODO Auto-generated method stub
return false;
}

@Override
public void onLongPress(MotionEvent e) {
// TODO Auto-generated method stub
       Intent intent = new Intent();
       intent.setClass(MainActivity.this, switch_target.class);
       startActivity(intent);
       overridePendingTransition(R.anim.in_from_right, R.anim.out_to_left);
       MainActivity.this.finish();
}

@Override
public boolean onScroll(MotionEvent e1, MotionEvent e2,
float distanceX, float distanceY) {
// TODO Auto-generated method stub
return false;
}

@Override
public void onShowPress(MotionEvent e) {
// TODO Auto-generated method stub

}

@Override
public boolean onSingleTapUp(MotionEvent e) {
// TODO Auto-generated method stub
return false;
}};


別忘記要import 所需要的東西

import android.view.GestureDetector;
import android.view.GestureDetector.OnGestureListener;


動畫的部分,首先要在res/anim裡面新增兩個xml檔

第一個檔,檔名隨意設定
<?xml version="1.0" encoding="utf-8"?>
<set xmlns:android="http://schemas.android.com/apk/res/android">
    <scale
        android:interpolator="@android:anim/linear_interpolator"
        android:fromXScale="0.0"
        android:toXScale="1.0"
        android:fromYScale="0.7"
        android:toYScale="1.0"
        android:fillAfter="false"
        android:startOffset="200"
        android:duration="200" />
    <translate
        android:fromXDelta="50%"
        android:toXDelta="0"
        android:startOffset="200"
        android:duration="200"/>
</set>


第二個檔也是檔名隨意設定


有了動畫xml檔 + 手勢(觸發事件),我們還缺一樣東西,就是切換activity


       Intent intent = new Intent();
       intent.setClass(MainActivity.this, switch_target.class);
       startActivity(intent);
       overridePendingTransition(R.anim.in_from_right, R.anim.out_to_left);
       MainActivity.this.finish();

切換Activity需要的就是intent,注意這邊

intent.setClass(MainActivity.this, switch_target.class);

是MainActivity.this, switch_target.class兩者是不一樣的,請不要搞錯了(搞錯他就會一直報錯)


The method setClass(Context, Class<?>) in the type Intent is not applicable for the arguments...............


這樣的錯誤訊息


另一端切換回來則是:

       Intent intent = new Intent();
       intent.setClass(switch_target.this,MainActivity.class);
       startActivity(intent);
       overridePendingTransition(R.anim.in_from_right, R.anim.out_to_left);
       switch_target.this.finish();


當然為了避免還是有人看了以後還是出錯,這邊也附上source code 方便大家看

這次的教學就到此囉 End